Deprecation Note
We published the last version of Graylog Documentation before the release of Graylog 4.2. Now, all documentation and help content for Graylog products are available at https://docs.graylog.org/.
There will be no further updates to these pages as of October 2021.
Do you have questions about our documentation? You may place comments or start discussions about documentation here: https://community.graylog.org/c/documentation-campfire/30
Usage
Creating Archives
There are three ways to create archives from the Graylog Elasticsearch indices.
Web Interface
You can manually create an archive on the “Enterprise/Archives” page in the web interface.
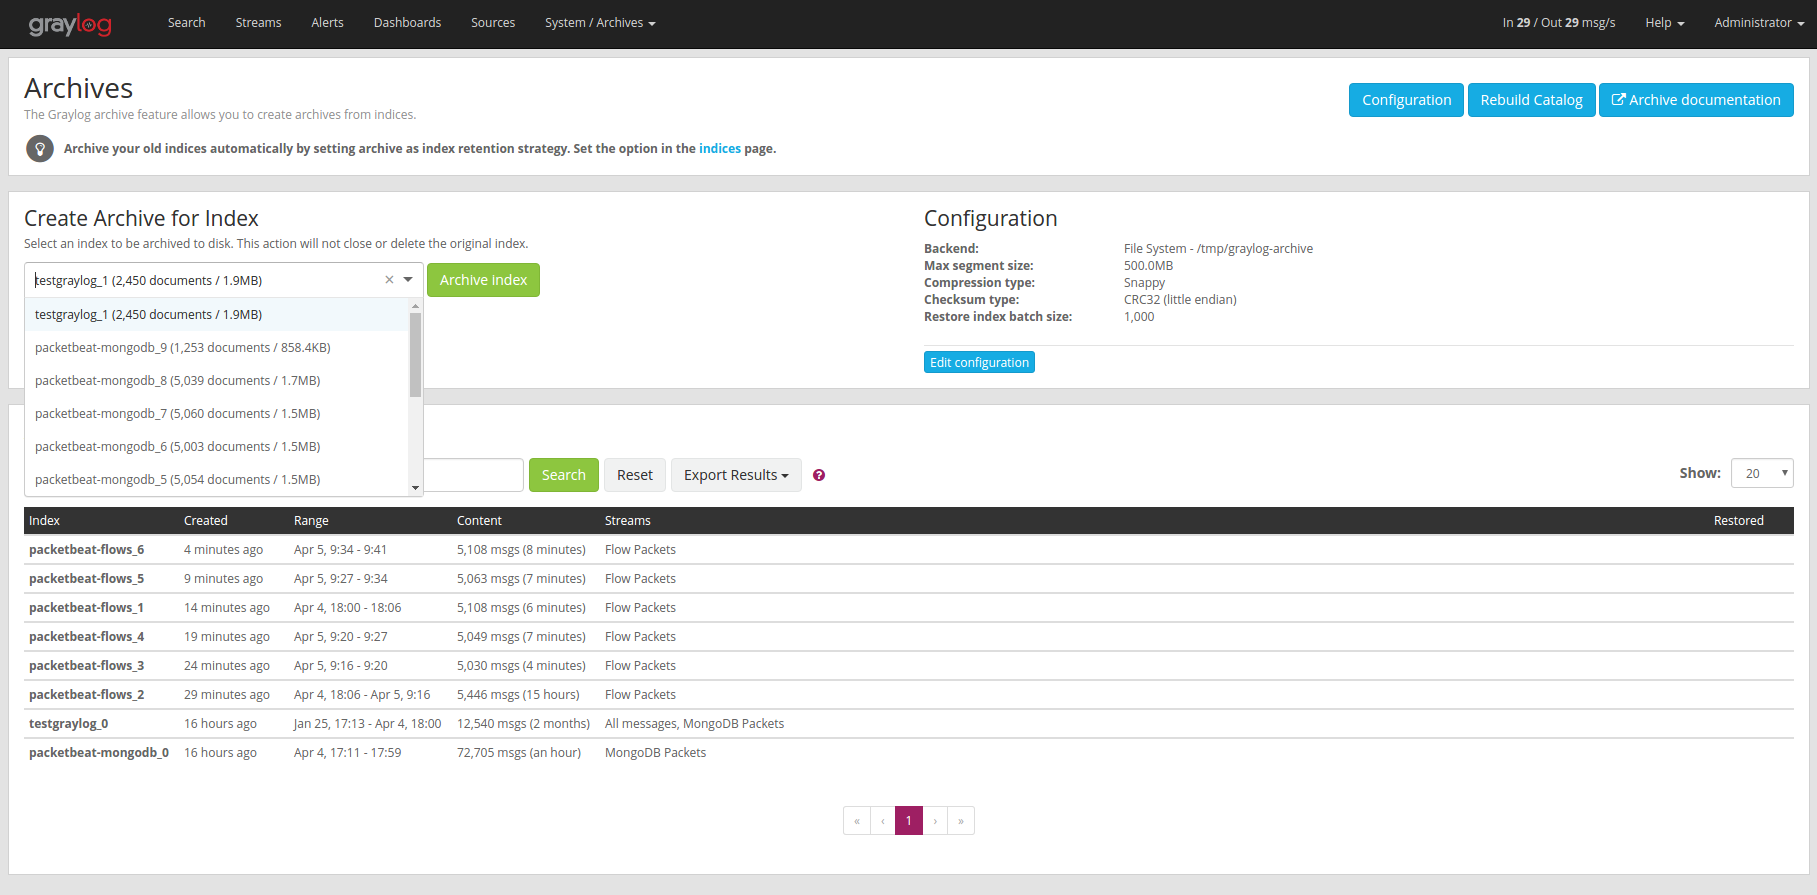
On the “Create Archive for Index” section of the page is a form where you can select an index and archive it by pressing “Archive Index”.
Using this will just archive the index to disk and does not close it or delete it. This is a great way to test the archiving feature without changing your index retention configuration.
Index Retention
Graylog Archive ships with an index retention strategy that can be used to automatically create archives before closing or deleting Elasticsearch indices.
This is the easiest way to automatically create archives without custom scripting.
Please see the Index Retention Configuration on how to configure it.
REST API
Graylog Archive also offers a REST API that you can use to automate archive creation if you have some special requirements and need a more flexible way to do this.

An index can be archived with a simple curl command:
$ curl -s -u admin -H 'X-Requested-By: cli' -X POST http://127.0.0.1:9000/api/plugins/org.graylog.plugins.archive/archives/graylog_386
Enter host password for user 'admin': ***************
{
   "archive_job_config" : {
     "archive_path" : "/tmp/graylog-archive",
     "max_segment_size" : 524288000,
     "segment_filename_prefix" : "archive-segment",
     "metadata_filename" : "archive-metadata.json",
     "source_histogram_bucket_size" : 86400000,
     "restore_index_batch_size" : 1001,
     "segment_compression_type": "SNAPPY"
   },
   "system_job" : {
     "id" : "cd7ebfa0-079b-11e6-9e1b-fa163e6e9b8a",
     "description" : "Archives indices and deletes them",
     "name" : "org.graylog.plugins.archive.job.ArchiveCreateSystemJob",
     "info" : "Archiving documents in index: graylog_386",
     "node_id" : "c5df7bff-cafd-4546-ac0a-5ccd2ba4c847",
     "started_at" : "2016-04-21T08:34:03.034Z",
     "percent_complete" : 0,
     "provides_progress" : true,
     "is_cancelable" : true
   }
 }
That command started a system job in the Graylog server to create an archive
for index graylog_386. The system_job.id can be used to check the
progress of the job.
The REST API can be used to automate other archive related tasks as well, like restoring and deleting archives or updating the archive config. See the REST API browser on your Graylog server for details.
Restoring Archives
Note
The restore process adds load to your Elasticsearch cluster because all messages are basically re-indexed. Please make sure to keep this in mind and test with smaller archives to see how your cluster behaves. Also use the Restore Index Batch Size setting to control the Elasticsearch batch size on re-index.
Graylog Archive offers two ways to restore archived indices.
Graylog Archive restores all indices into the “Restored Archives” index set to avoid conflicts with the original indices. (should those still exist)
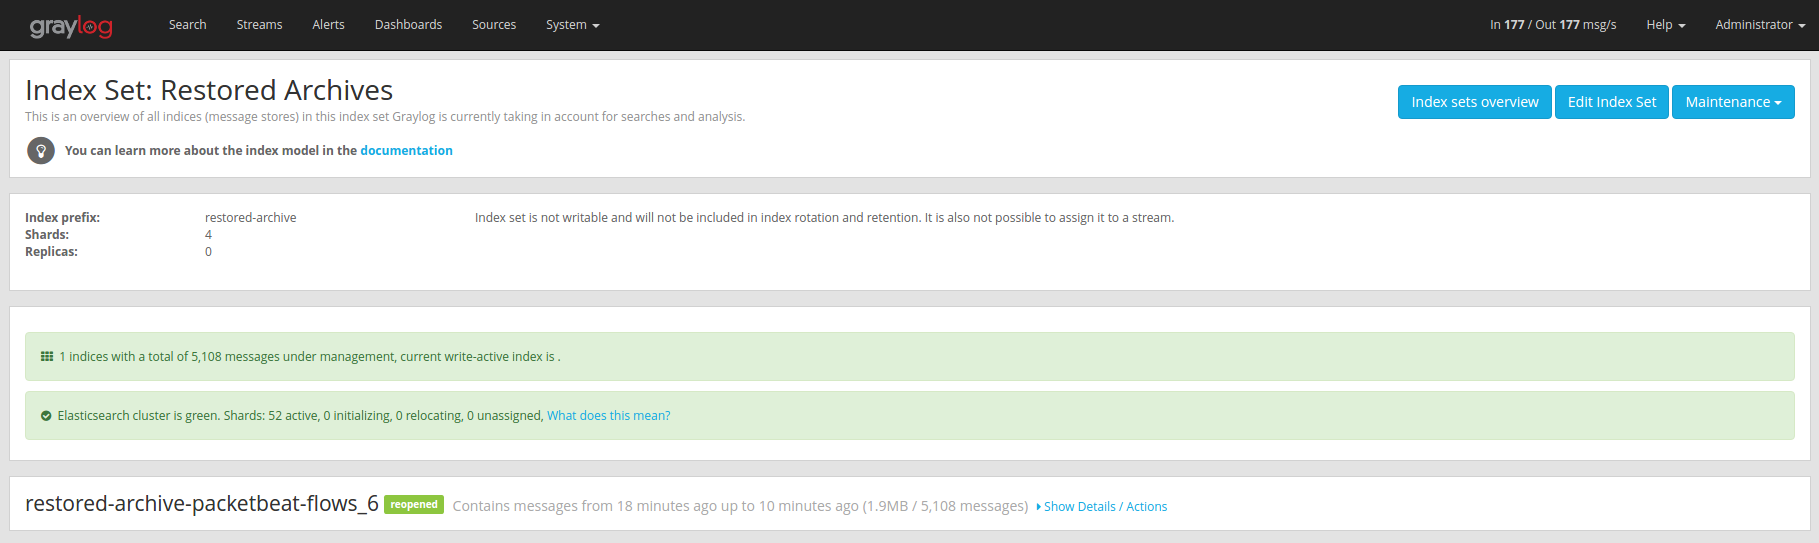
Restored indices are also marked as reopened so they are ignored by
index retention jobs and are not closed or deleted. That means you have to
manually delete any restored indices manually once you do not need them
anymore.
Web Interface
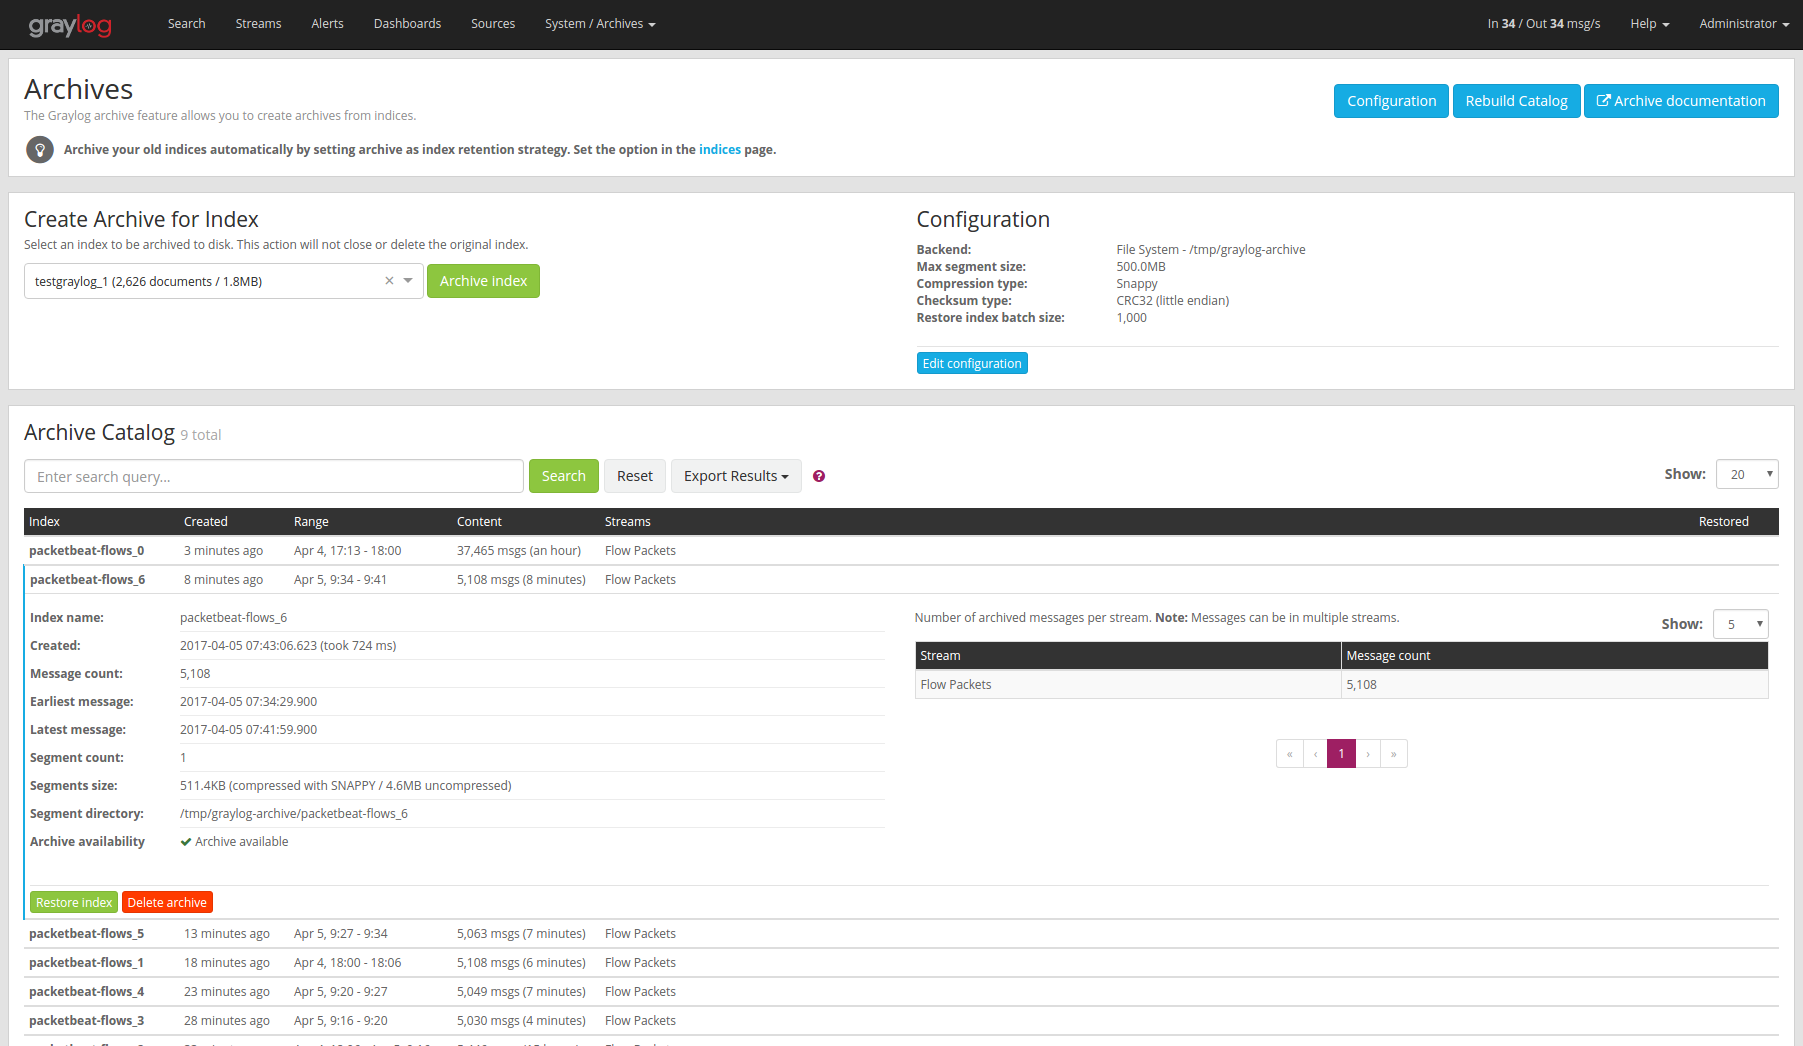
In the web interface you can restore an archive on the “Enterprise/Archives” page by selecting an archive from the list, open the archive details and clicking the “Restore Index” button.
REST API
As with archive creation you can also use the REST API to restore an archived index into the Elasticsearch cluster:
$ curl -s -u admin -H 'X-Requested-By: cli' -X POST http://127.0.0.1:9000/api/plugins/org.graylog.plugins.archive/archives/graylog_386/restore
Enter host password for user 'admin': ***************
{
   "archive_metadata": {
     "archive_id": "graylog_307",
     "index_name": "graylog_307",
     "document_count": 491906,
     "created_at": "2016-04-14T14:31:50.787Z",
     "creation_duration": 142663,
     "timestamp_min": "2016-04-14T14:00:01.008Z",
     "timestamp_max": "2016-04-14T14:29:27.639Z",
     "id_mappings": {
       "streams": {
         "56fbafe0fb121a5309cef297": "nginx requests"
       },
       "inputs": {
         "56fbafe0fb121a5309cef290": "nginx error_log",
         "56fbafe0fb121a5309cef28d": "nginx access_log"
       },
       "nodes": {
         "c5df7bff-cafd-4546-ac0a-5ccd2ba4c847": "graylog.example.org"
       }
     },
     "histogram_bucket_size": 86400000,
     "source_histogram": {
       "2016-04-14T00:00:00.000Z": {
         "example.org": 227567
       }
     },
     "segments": [
       {
         "path": "archive-segment-0.gz",
         "size": 21653755,
         "raw_size": 2359745839,
         "compression_type": "SNAPPY"
         "checksum": "751e6e76",
         "checksum_type": "CRC32"
       }
     ],
     "index_size": 12509063,
     "index_shard_count": 4
   },
   "system_job": {
     "id": "e680dcc0-07a2-11e6-9e1b-fa163e6e9b8a",
     "description": "Restores an index from the archive",
     "name": "org.graylog.plugins.archive.job.ArchiveRestoreSystemJob",
     "info": "Restoring documents from archived index: graylog_307",
     "node_id": "c5df7bff-cafd-4546-ac0a-5ccd2ba4c847",
     "started_at": "2016-04-21T09:24:51.468Z",
     "percent_complete": 0,
     "provides_progress": true,
     "is_cancelable": true
   }
 }
The returned JSON payload contains the archive metadata and the system job description that runs the index restore process.
Restore into a separate cluster
As said earlier, restoring archived indices slow down your indexing speed because of added load. If you want to completely avoid adding more load to your Elasticsearch cluster, you can restore the archived indices on a different cluster.
To do that, you only have to transfer the archived indices to a different machine and put them into a configured Backend.
Each index archive is in a separate directory, so if you only want to transfer one index to a different machine, you only have to copy the corresponding directory into the backend.
Example:
$ tree /tmp/graylog-archive
  /tmp/graylog-archive
  ├── graylog_171
  │   ├── archive-metadata.json
  │   └── archive-segment-0.gz
  ├── graylog_201
  │   ├── archive-metadata.json
  │   └── archive-segment-0.gz
  ├── graylog_268
  │   ├── archive-metadata.json
  │   └── archive-segment-0.gz
  ├── graylog_293
  │   ├── archive-metadata.json
  │   └── archive-segment-0.gz
  ├── graylog_307
  │   ├── archive-metadata.json
  │   └── archive-segment-0.gz
  ├── graylog_386
  │   ├── archive-metadata.json
  │   └── archive-segment-0.gz
  └── graylog_81
      ├── archive-metadata.json
      └── archive-segment-0.gz
  7 directories, 14 files
Searching in Restored Indices
Once an index has been restored from an archive it will be used by search queries automatically.
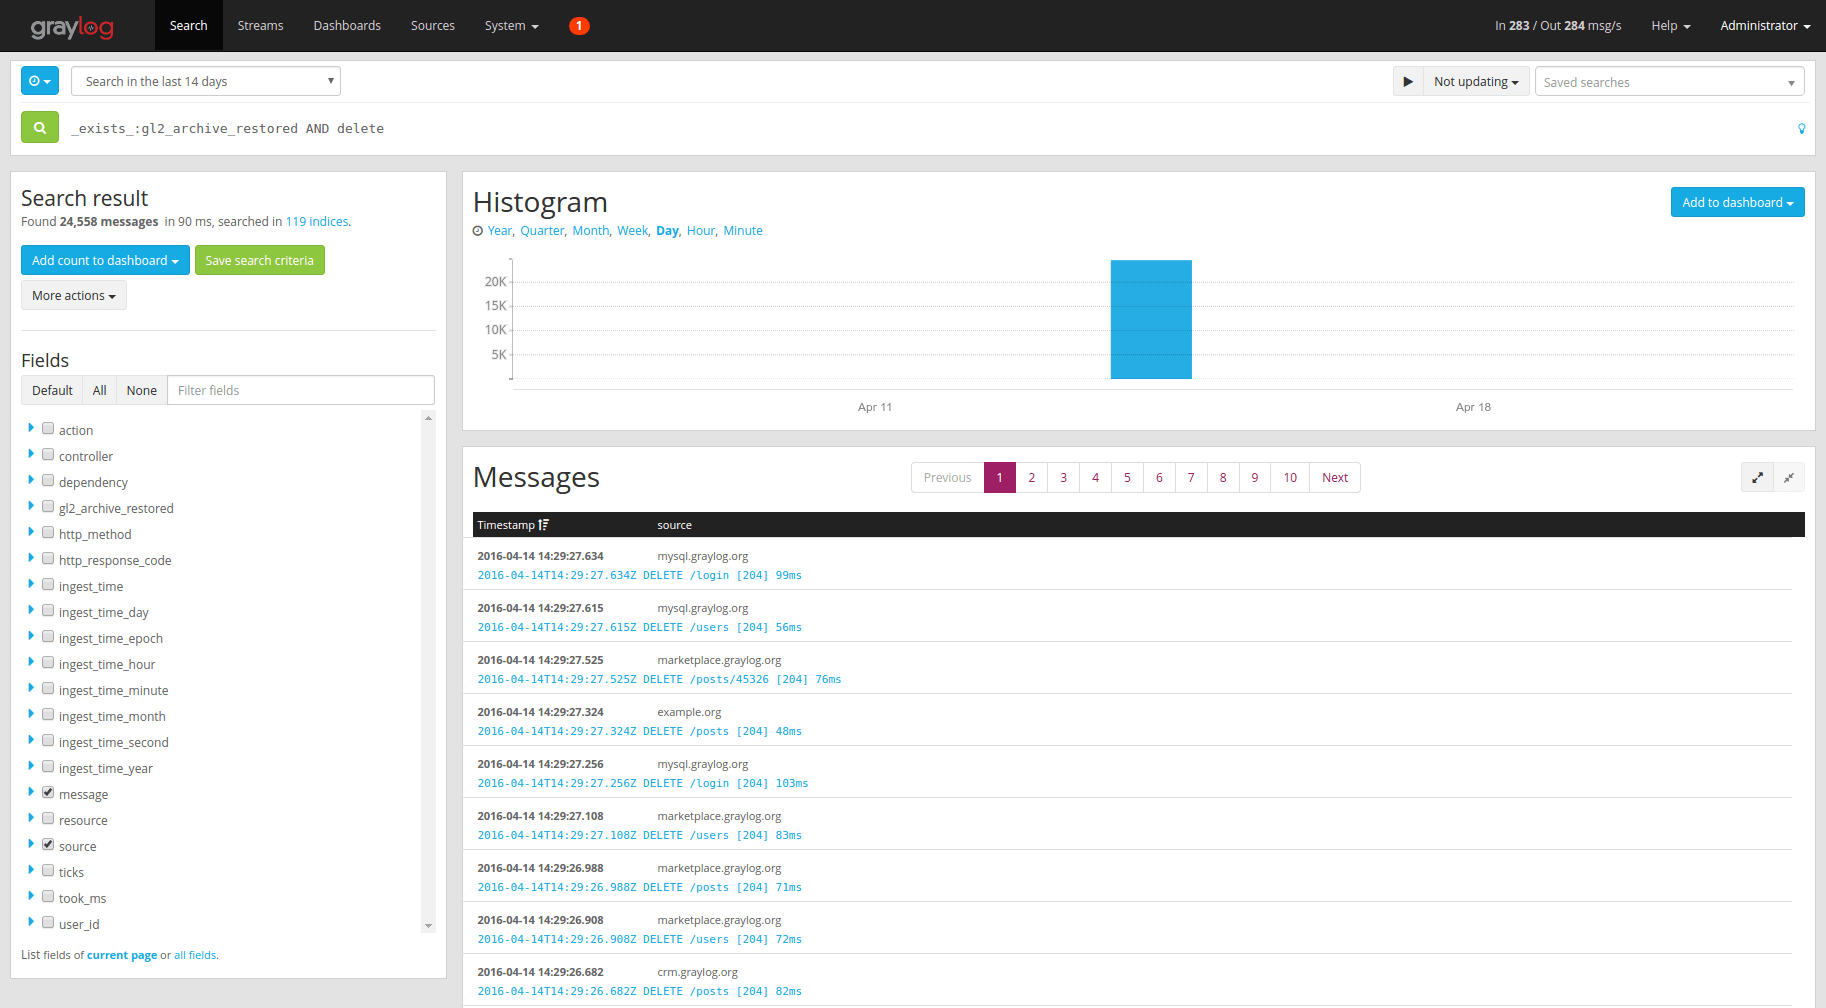
Every message that gets restored into an Elasticsearch index gets a special
gl2_archive_restored field with value true. This allows you to only
search in restored messages by using a query like:
_exists_:gl2_archive_restored AND <your search query>
Example:
If you want to exclude all restored messages from you query you can use:
_missing_:gl2_archive_restored AND <your search query>